Deploy lakeFS on GCP
Tip
The instructions given here are for a self-managed deployment of lakeFS on GCP.
For a hosted lakeFS service with guaranteed SLAs, please contact us for details of lakeFS Cloud on GCP.
When you deploy lakeFS on GCP these are the options available to use:
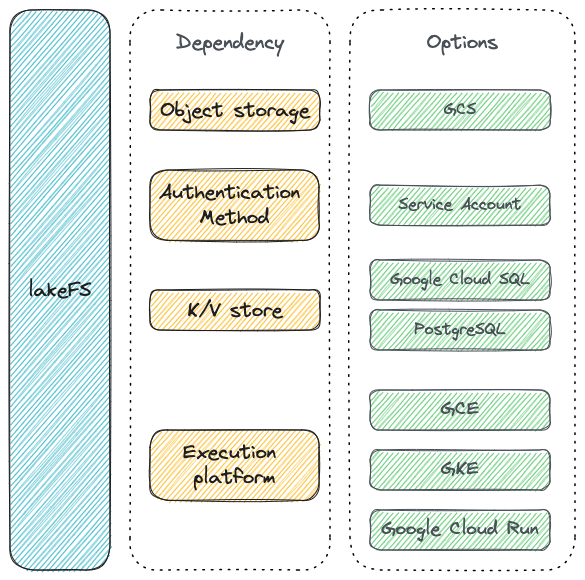
⏰ Expected deployment time: 25 min
Create a Database
lakeFS requires a PostgreSQL database to synchronize actions on your repositories. We will show you how to create a database on Google Cloud SQL, but you can use any PostgreSQL database as long as it's accessible by your lakeFS installation.
If you already have a database, take note of the connection string and skip to the next step
- Follow the official Google documentation on how to create a PostgreSQL instance. Make sure you're using PostgreSQL version >= 11.
- On the Users tab in the console, create a user. The lakeFS installation will use it to connect to your database.
- Choose the method by which lakeFS will connect to your database. Google recommends using the SQL Auth Proxy.
Run the lakeFS Server
- Save the following configuration file as
config.yaml:
---
database:
    type: "postgres"
    postgres:
    connection_string: "[DATABASE_CONNECTION_STRING]"
auth:
    encrypt:
    # replace this with a randomly-generated string:
    secret_key: "[ENCRYPTION_SECRET_KEY]"
blockstore:
    type: gs
    # Uncomment the following lines to give lakeFS access to your buckets using a service account:
    # gs:
    #   credentials_json: [YOUR SERVICE ACCOUNT JSON STRING]
- Download the binary to run on the GCE instance.
- Run the
lakefsbinary on the GCE machine: Note: it is preferable to run the binary as a service using systemd or your operating system's facilities.
To support container-based environments like Google Cloud Run, lakeFS can be configured using environment variables. Here is a docker run
command to demonstrate starting lakeFS using Docker:
docker run \
    --name lakefs \
    -p 8000:8000 \
    -e LAKEFS_DATABASE_TYPE="postgres" \
    -e LAKEFS_DATABASE_POSTGRES_CONNECTION_STRING="[DATABASE_CONNECTION_STRING]" \
    -e LAKEFS_AUTH_ENCRYPT_SECRET_KEY="[ENCRYPTION_SECRET_KEY]" \
    -e LAKEFS_BLOCKSTORE_TYPE="gs" \
    treeverse/lakefs:latest run
See the [reference][config-envariables] for a complete list of environment variables.
You can install lakeFS on Kubernetes using a Helm chart.
To install lakeFS with Helm:
- Copy the Helm values file relevant for Google Storage:
secrets:
    # replace DATABASE_CONNECTION_STRING with the connection string of the database you created in a previous step.
    # e.g.: postgres://postgres:myPassword@localhost/postgres:5432
    databaseConnectionString: [DATABASE_CONNECTION_STRING]
    # replace this with a randomly-generated string
    authEncryptSecretKey: [ENCRYPTION_SECRET_KEY]
lakefsConfig: |
    blockstore:
        type: gs
        # Uncomment the following lines to give lakeFS access to your buckets using a service account:
        # gs:
        #   credentials_json: [YOUR SERVICE ACCOUNT JSON STRING]
conf-values.yaml. For more configuration options, see our Helm chart README.
Note
The lakefsConfig parameter is the lakeFS configuration documented here but without sensitive information.
Sensitive information like databaseConnectionString is given through separate parameters, and the chart will inject it into Kubernetes secrets.
- In the directory where you created
conf-values.yaml, run the following commands:
# Add the lakeFS repository
helm repo add lakefs https://charts.lakefs.io
# Deploy lakeFS
helm install my-lakefs lakefs/lakefs -f conf-values.yaml
my-lakefs is the Helm Release name.
Load balancing
To configure a load balancer to direct requests to the lakeFS servers you can use the LoadBalancer Service type or a Kubernetes Ingress.
By default, lakeFS operates on port 8000 and exposes a /_health endpoint that you can use for health checks.
Tip
The NGINX Ingress Controller by default limits the client body size to 1 MiB.
Some clients use bigger chunks to upload objects - for example, multipart upload to lakeFS using the [S3-compatible Gateway][s3-gateway] or a simple PUT request using the [OpenAPI Server][openapi].
Checkout the Nginx documentation for increasing the limit, or an example of Nginx configuration with MinIO.
Create the admin user
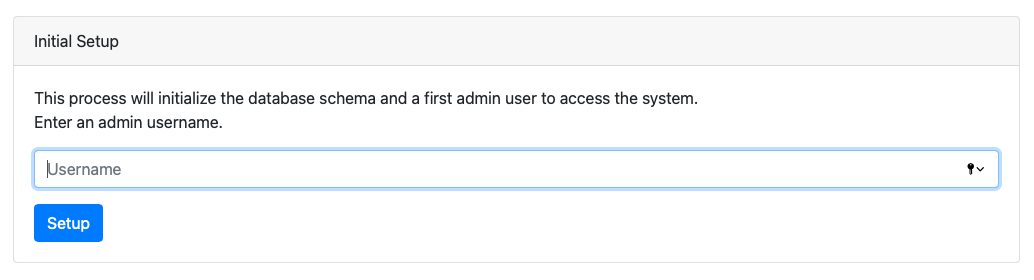
When you first open the lakeFS UI, you will be asked to create an initial admin user.
- Open
http://<lakefs-host>/in your browser. If you haven't set up a load balancer, this will likely behttp://<instance ip address>:8000/ - On first use, you'll be redirected to the setup page:
- Follow the steps to create an initial administrator user. Save the credentials you’ve received somewhere safe, you won’t be able to see them again!
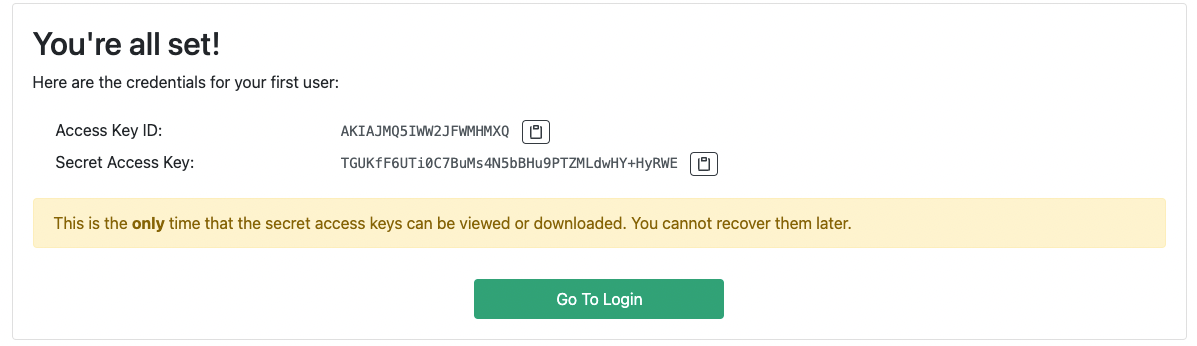
- Follow the link and go to the login screen. Use the credentials from the previous step to log in.
Configure minimal permissions for your GCS bucket
If required, lakeFS can operate without accessing the data itself. This permission model is useful if you are running a zero trust architecture, using [presigned URLs mode][presigned-url], or the [lakeFS Hadoop FileSystem Spark integration][integration-hadoopfs].
Dedicated GCP Project Recommended
Due to the nature of VPC Service Controls which place a perimeter around the entire GCS service, it's strongly recommended to use a dedicated GCP project for your lakeFS bucket. This simplifies permission and access management significantly.
Architecture Overview
This setup uses two service accounts:
- Metadata Service Account (SA_OPEN): Accesses bucket prefixes in the form of
gs://<bucket-name>/<prefix>/_lakefs/from anywhere. - Data Service Account (SA_RESTRICTED): Accesses all data except bucket prefixes in the form of
gs://<bucket-name>/<prefix>/_lakefs/, restricted by network using VPC Service Controls.
lakeFS always requires permissions to access the _lakefs prefix under your storage namespace, where metadata is stored.
Limitations
This configuration supports only presign mode. This means that you won't be able to:
- Upload objects using the lakeFS Web UI (presign mode is configurable)
- Upload objects through lakeFS S3 Gateway
- Run
lakectl fscommands
Setup Steps
1. Create Service Accounts
Set your environment variables:
export PROJECT_ID="[YOUR_PROJECT_ID]"
export SA_OPEN_ID="lakefs-metadata"
export SA_RESTRICTED_ID="lakefs-data"
export BUCKET="[YOUR_BUCKET_NAME]"
Create the service accounts:
# Metadata service account (accesses _lakefs/** from anywhere)
gcloud iam service-accounts create "${SA_OPEN_ID}" \
  --project="${PROJECT_ID}" \
  --description="lakeFS metadata - RW only under /_lakefs/** (from anywhere)" \
  --display-name="lakeFS Metadata Service Account"

# Data service account (accesses everything except _lakefs/**, network-restricted)
gcloud iam service-accounts create "${SA_RESTRICTED_ID}" \
  --project="${PROJECT_ID}" \
  --description="lakeFS data - RW everywhere except /_lakefs/** (network-restricted)" \
  --display-name="lakeFS Data Service Account"
Get the full service account emails:
export SA_OPEN="${SA_OPEN_ID}@${PROJECT_ID}.iam.gserviceaccount.com"
export SA_RESTRICTED="${SA_RESTRICTED_ID}@${PROJECT_ID}.iam.gserviceaccount.com"
2. Configure Bucket IAM Policies
In this step, we will configure the IAM policies on the bucket level to grant the necessary permissions for the service accounts.
Grant the metadata service account access to gs://<bucket-name>/<prefix>/_lakefs/ prefix only:
gcloud storage buckets add-iam-policy-binding "gs://${BUCKET}" \
  --member="serviceAccount:${SA_OPEN}" \
  --role="roles/storage.objectAdmin" \
  --condition='title=lakefs-metadata-only,description=Access_only_to_lakefs_prefix,expression=resource.type == "storage.googleapis.com/Object" && resource.name.extract("/objects/{prefix}/_lakefs/") != ""'
Grant the data service account access to everything except gs://<bucket-name>/<prefix>/_lakefs/ prefix:
# Object access (read/write) for non-_lakefs paths
gcloud storage buckets add-iam-policy-binding "gs://${BUCKET}" \
  --member="serviceAccount:${SA_RESTRICTED}" \
  --role="roles/storage.objectAdmin" \
  --condition='title=lakefs-data-only,description=Access_except_lakefs_prefix,expression=resource.type == "storage.googleapis.com/Object" && resource.name.extract("/objects/{prefix}/_lakefs/") == ""'
Create a custom IAM role for listing objects and grant it to the data service account:
# Create custom role for listing objects only
gcloud iam roles create lakefsDataListOnly \
  --project="${PROJECT_ID}" \
  --title="lakeFS Data List Only" \
  --description="Custom role for lakeFS data service account to list objects" \
  --permissions="storage.objects.list"

# Grant the custom role to the data service account
gcloud projects add-iam-policy-binding "${PROJECT_ID}" \
  --member="serviceAccount:${SA_RESTRICTED}" \
  --role="projects/${PROJECT_ID}/roles/lakefsDataListOnly"
3. Set Up VPC Service Controls
Create an access level that defines your allowed networks (adjust IP ranges and VPC as needed):
# Get your organization's access policy ID
export ORG_ID="[YOUR_ORG_ID]"
export POLICY_ID=$(gcloud access-context-manager policies list \
  --organization="${ORG_ID}" \
  --format="value(name)")

# Create an access level for your allowed networks
cat > access-level.yaml <<EOF
- ipSubnetworks:
  - "[YOUR_ALLOWED_IP_CIDR]"
  vpcNetworkSources:
  - vpcSubnetwork:
      network: "projects/[YOUR_VPC_PROJECT]/global/networks/[YOUR_VPC_NAME]"
EOF

gcloud access-context-manager levels create Restrict_Network_Access \
  --policy="${POLICY_ID}" \
  --title="Restrict Network Access to Approved IPs and VPCs" \
  --combine-function=OR \
  --basic-level-spec=access-level.yaml
4. Create Ingress Policy
Define the ingress policy for the restricted service account:
export ACCESS_LEVEL="accessPolicies/${POLICY_ID}/accessLevels/Restrict_Network_Access"

cat > ingress-policy.yaml <<EOF
- ingressFrom:
    identities:
    - serviceAccount:${SA_RESTRICTED}
    sources:
    - accessLevel: ${ACCESS_LEVEL}
  ingressTo:
    operations:
    - serviceName: storage.googleapis.com
    resources:
    - '*'
  title: lakeFS Data Service Account Ingress
EOF
5. Create VPC Service Controls Perimeter
gcloud access-context-manager perimeters create lakefs_perimeter \
  --policy="${POLICY_ID}" \
  --title="lakeFS Security Perimeter" \
  --resources="projects/${PROJECT_ID}" \
  --restricted-services="storage.googleapis.com" \
  --ingress-policies=ingress-policy.yaml
6. Update lakeFS configuration
In your lakeFS configuration, update the credentials for the blockstore to use the metadata and data service accounts:
blockstore:
  type: gs
  gs:
    credentials_json: [SA_OPEN_SERVICE_ACCOUNT_JSON]
    # Alternatively, you can use a file path:
    # data_credentials_file: /path/to/sa_restricted_service_account.json
For data operations, your clients should use the data service account (SA_RESTRICTED) credentials and must access from within the allowed networks and VPCs defined in your VPC Service Controls.
Network Access Control
With this setup:
- lakeFS server uses SA_OPEN to access metadata (
_lakefs/) from any network - Data access through SA_RESTRICTED is only permitted from approved IP addresses and VPCs defined in the VPC Service Controls access level
- Clients accessing data must be within the allowed network perimeter
This provides similar security to AWS's condition keys (like aws:SourceVpc and aws:SourceIp) but using GCP's VPC Service Controls.
Create your first repository
- Use the credentials from the previous step to log in
- Click Create Repository and choose Blank Repository.
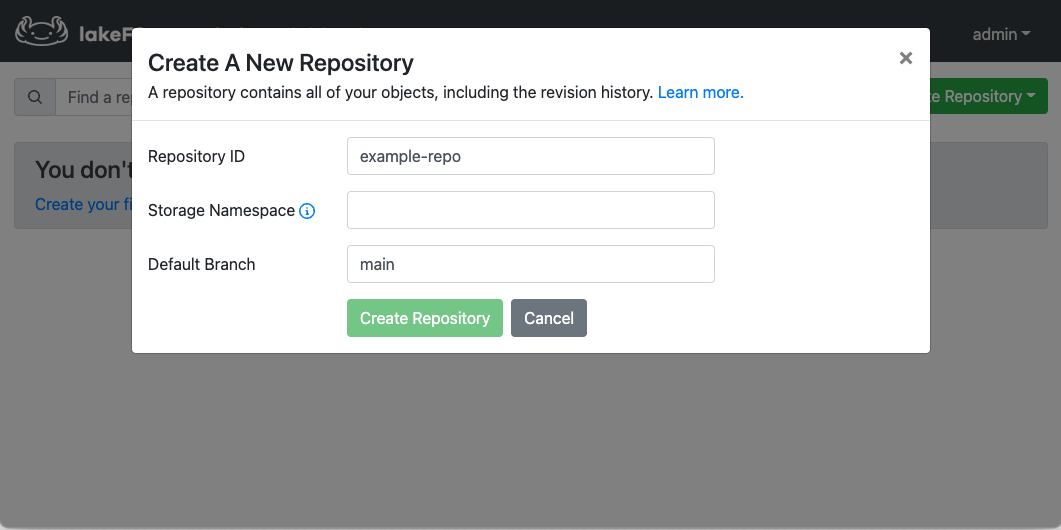
- Under Storage Namespace, enter a path to your desired location on the object store. This is where data written to this repository will be stored.
- Click Create Repository
- You should now have a configured repository, ready to use!
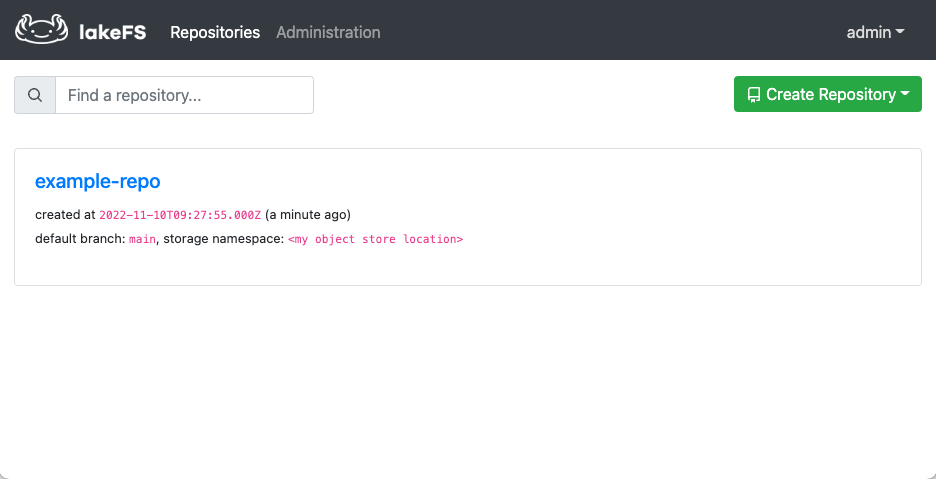
Congratulations
Your environment is now ready 🤩